
How Often Should You Seal Your Fence? A Complete Guide to Fence Maintenance
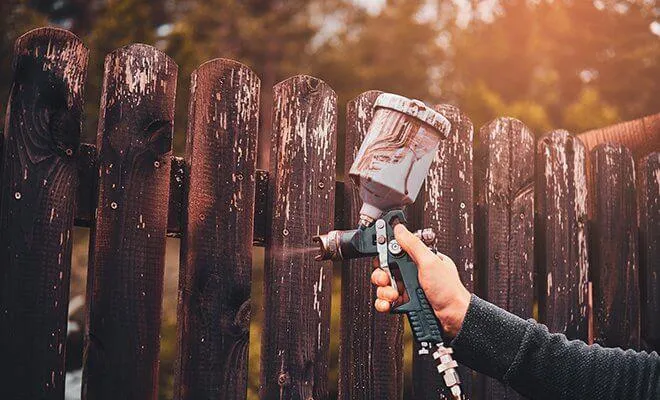
Is your fence starting to look a bit weathered? You might be wondering, "how often should you seal your fence?"
Well, you're not alone! Many homeowners struggle with timing their fence maintenance just right.
Today, we'll help you understand exactly when and how to seal your fence to keep it looking beautiful and lasting longer.
With proper timing and technique, you can protect your investment and maintain your property's curb appeal for years to come.
Why Sealing Your Fence Matters
According to the Wood Products Council, proper sealing can:
Double your fence's lifespan
Prevent costly repairs
Protect against water damage
Maintain property value
Prevent wood rot and decay
Enhance wood grain appearance
Block harmful UV rays
Resist insect infestation
Reduce maintenance costs
Prevent warping and splitting
Improve neighborhood aesthetics
Increase structural stability
Signs It's Time to Seal
Look for these clear indicators:
Water no longer beads on the surface
Wood appears dry or gray
Splinters are forming
Visible cracks or warping
Mold or mildew growth
Fading or discoloration
Rough texture
Loose boards
Green algae growth
Peeling previous sealer
Black spots appearing
Wood feels soft in places
The Ideal Sealing Schedule
The Forest Products Laboratory recommends these detailed timeframes:
New Fences
They don't rot like wood fences
They never rust like metal fences
They resist damage from insects
They don't need painting or staining
They can handle extreme weather conditions
Established Fences
Seal every 2-3 years
Check annually for wear
Adjust based on climate
Test with water absorption
Keep maintenance records
Monitor problem areas
Schedule professional inspections
Choosing the Right Wood Fence Sealer
Consider these factors:
Type of Sealer
Oil-based for deep penetration
Water-based for easy cleanup
Hybrid formulas for best of both
Clear sealers for natural look
Tinted options for color enhancement
Semi-transparent for grain showing
Solid stains for maximum protection
Features to Look For
UV protection level
Mold resistance rating
Water repellency factor
Color retention guarantee
Easy application methods
Drying time requirements
Coverage per gallon
Warranty terms
Regional Climate-Specific Recommendations
Adjust your sealing schedule based on your climate:
Coastal Areas
Salt air exposure
Seal every 1-2 years
Use marine-grade sealers
Regular salt removal needed
Desert Regions
High UV exposure
Seal every 2-3 years
UV-resistant products required
Monitor for sun damage
Rainy Climates
Constant moisture exposure
Seal every 1-2 years
Water-repellent formulas
Check drainage regularly
Safety Precautions and Equipment
Essential safety measures include:
Personal Protection
Safety goggles
Respiratory mask
Chemical-resistant gloves
Long-sleeve clothing
Closed-toe shoes
Work Area Safety
Proper ventilation
Secure ladder placement
Clear workspace
First aid kit nearby
Emergency contact info
Complete Step-by-Step Sealing Process
Initial Preparation
Check weather forecast
Gather all materials
Clear fence perimeter
Remove nearby objects
Cover plants and grass
Set up work area
Clean the Fence
Use appropriate cleaner
Remove surface dirt
Scrub problem areas
Rinse thoroughly
Allow complete drying
Check for missed spots
If you're wondering whether you should pressure wash fence before staining, the answer is generally yes — a pressure washer does a much more thorough job of lifting embedded dirt, old sealant residue, and mildew than scrubbing alone, just be sure to use a lower PSI setting and let the wood dry fully (usually 48 hours) before applying any sealer.
Repair and Prepare
Replace damaged boards
Tighten loose screws
Sand rough areas
Fill holes and gaps
Remove old sealant
Test wood moisture content
Apply Sealer
Start at top section
Work in manageable areas
Use proper technique
Maintain wet edge
Check for runs
Apply evenly
Allow proper drying
Professional Tips for Success
Timing Considerations
Check extended forecast
Avoid humid days
Plan for dry weather
Consider temperature range
Allow adequate time
Schedule early morning
Application Techniques
Use quality brushes
Maintain consistent pressure
Follow wood grain
Overlap strokes
Back-brush as needed
Check coverage frequently
Advanced Maintenance Schedule
Create a yearly plan:
January: Planning and inspection
March: Spring cleaning
May: Minor repairs
July: Summer inspection
September: Fall preparation
November: Winter protection
Environmental Impact Considerations
Make eco-conscious choices:
Product Selection
Low-VOC formulas
Water-based options
Biodegradable cleaners
Sustainable materials
Local regulations compliance
Product Selection
Minimize overspray
Proper disposal
Protect vegetation
Contain runoff
Recycle containers
Seasonal Maintenance Tips
Spring Tasks
Deep cleaning
Check winter damage
Plan major repairs
Schedule sealing
Clear vegetation
Summer Care
Monitor sun damage
Clean regularly
Touch up as needed
Check drainage
Trim nearby plants
Fall Preparation
Clear debris
Check structural integrity
Make repairs
Clean gutters
Plan winter protection
Winter Monitoring
Check for ice damage
Remove snow buildup
Monitor moisture levels
Plan spring maintenance
Document issues
Troubleshooting Common Sealing Problems
Peeling Sealer
Clean surface thoroughly
Remove all loose material
Check wood moisture content
Apply thinner coats
Use proper primer when needed
Uneven Coverage
Maintain wet edge
Use consistent pressure
Apply in optimal weather
Choose appropriate tools
Work in smaller sections
Professional vs DIY Cost Analysis
Professional Service
Labor: $2-4 per square foot
Materials: Included
Equipment: Provided
Warranty: Usually included
Time saved: 2-3 days
DIY Project
Materials: $1-2 per square foot
Equipment rental: $50-100
Tools: $100-200
Time investment: 3-5 days
Learning curve: Moderate
Cost-Saving Strategies
Preventive Maintenance
Regular inspections
Prompt repairs
Quality materials
Proper application
Documentation
Long-term Planning
Bulk purchasing
Tool investment
Professional training
Maintenance schedule
Weather monitoring
Conclusion
Understanding how often should you seal your fence is crucial for maintaining its beauty and durability. By following our comprehensive guide and maintaining a regular sealing schedule, you'll protect your investment and keep your fence looking great for years to come. Remember, prevention is always easier than repair, so mark your calendar and stick to your maintenance schedule!
Take action today by inspecting your fence and planning your maintenance schedule. Your fence is an important part of your property's value and appearance. With proper care and regular sealing, it will continue to enhance your home's beauty and security for many years to come.
4. Maintenance Free Fencing
If you're in Tampa, Spokane or Longview check our local service page for pricing.

© 2026 | All Rights Reserved | Privacy Policy